Picture an assistant that keeps an eye on your inbox: it reads your mail, pings you only about what matters, and — whenever you want — leaves the work half done for you. That's inbox-helper, and it comes in levels: from "just keep an eye on my mail" to "leave me a ready-made draft", always with a safety net.
inbox-helper is a hablo in-house plugin: it doesn't exist in plain OpenClaw. And you don't need to know anything technical or log into any server — everything happens from a web panel that your own agent opens for you.
Open your panel
It's the only thing you have to remember:
- Open the private Telegram chat with your agent (the same one you talk to it through).
- Type
/inbox🟡 - It replies with a link. Tap it → your panel opens.
🔗 The link lasts 30 minutes. When it expires, just type /inbox again and you'll get a new one. Don't share it: it's your access.
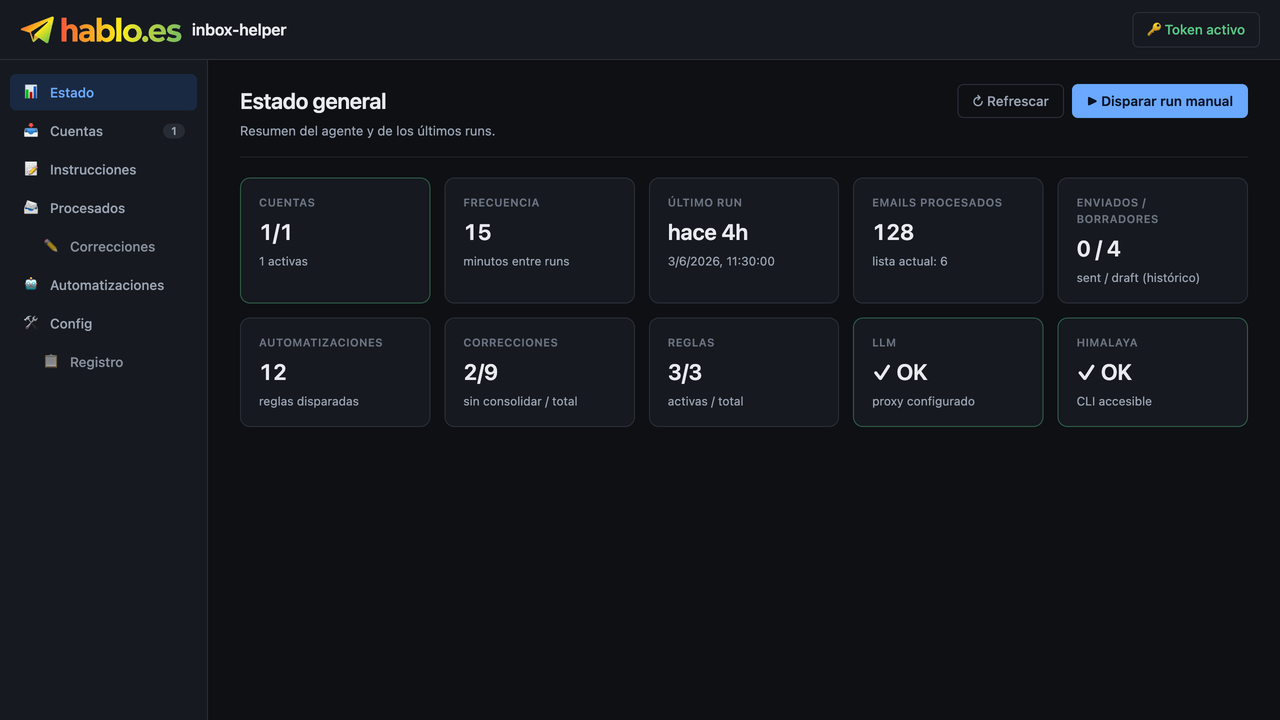
You'll see several tabs: Status · Accounts · Instructions · Processed · Automations. The Status tab is the summary of how everything's going:
Does /inbox do nothing? Then your agent doesn't have inbox-helper switched on yet — ask whoever manages your agent for it.
Level 1 · Get a heads-up on what matters 🟢
The safest level of all. It doesn't touch your mail: it doesn't mark as read, doesn't archive, doesn't move or delete anything. It just reads, scores and gives you a heads-up. Your inbox stays exactly as it is. It's the best place to start.
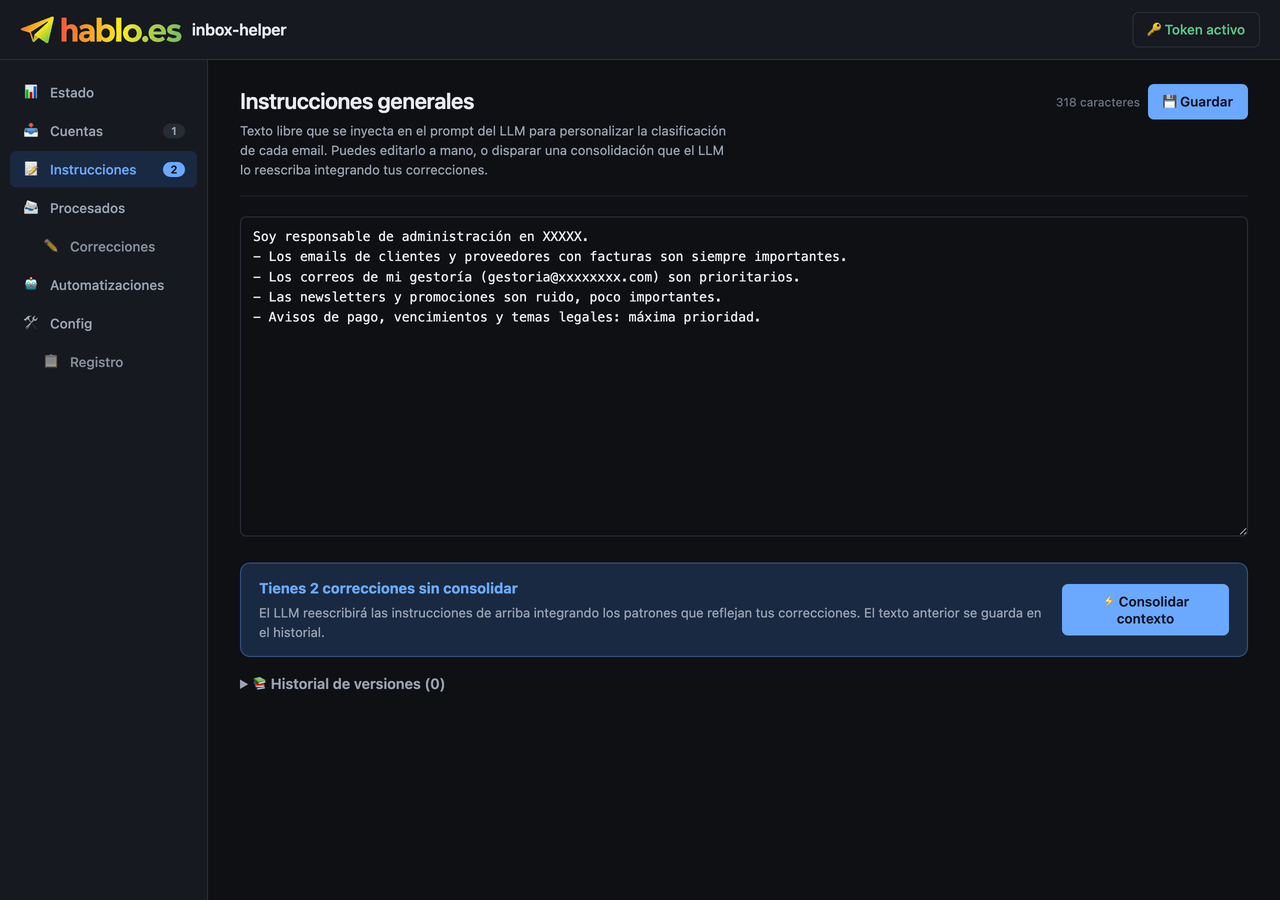
1. Tell it who you are and what you care about
In the Instructions tab, write your context in plain language: what you do, which emails are urgent for you, which senders matter to you… The more specific you are, the better it gets it right.
2. Turn on Telegram alerts
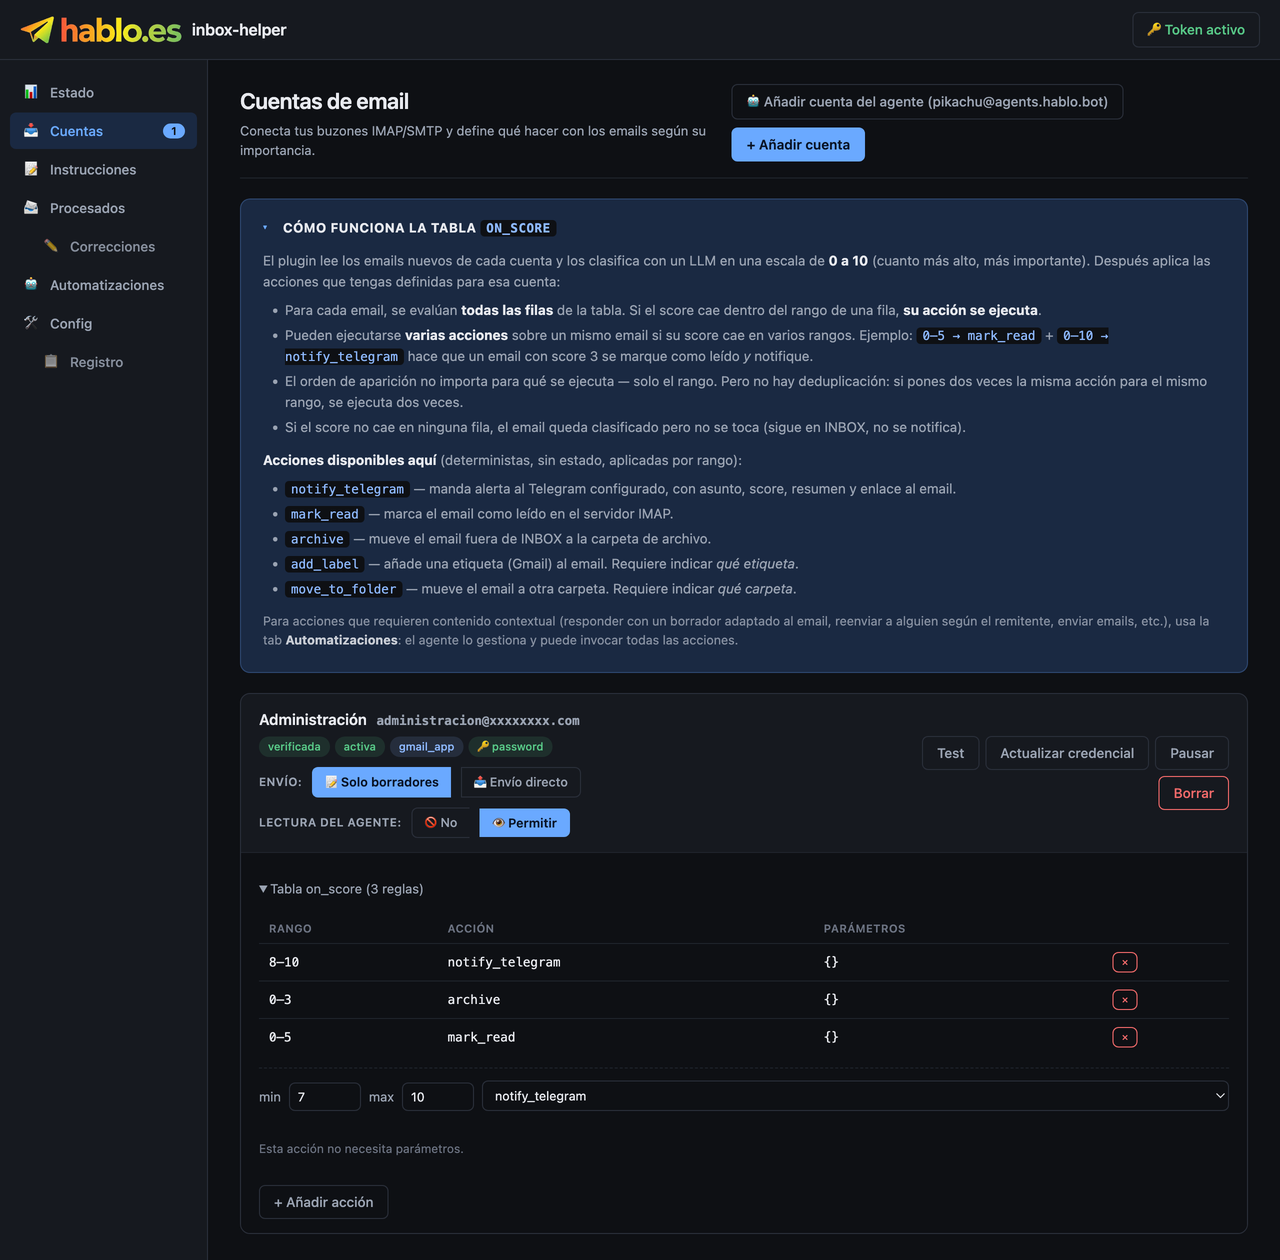
The plugin scores each email from 0 to 10 (the higher, the more important). In the Accounts tab → the on_score table, add a rule:
- When an email scores between 8 and 10 →
notify_telegram(ping me on Telegram).
3. Check it works
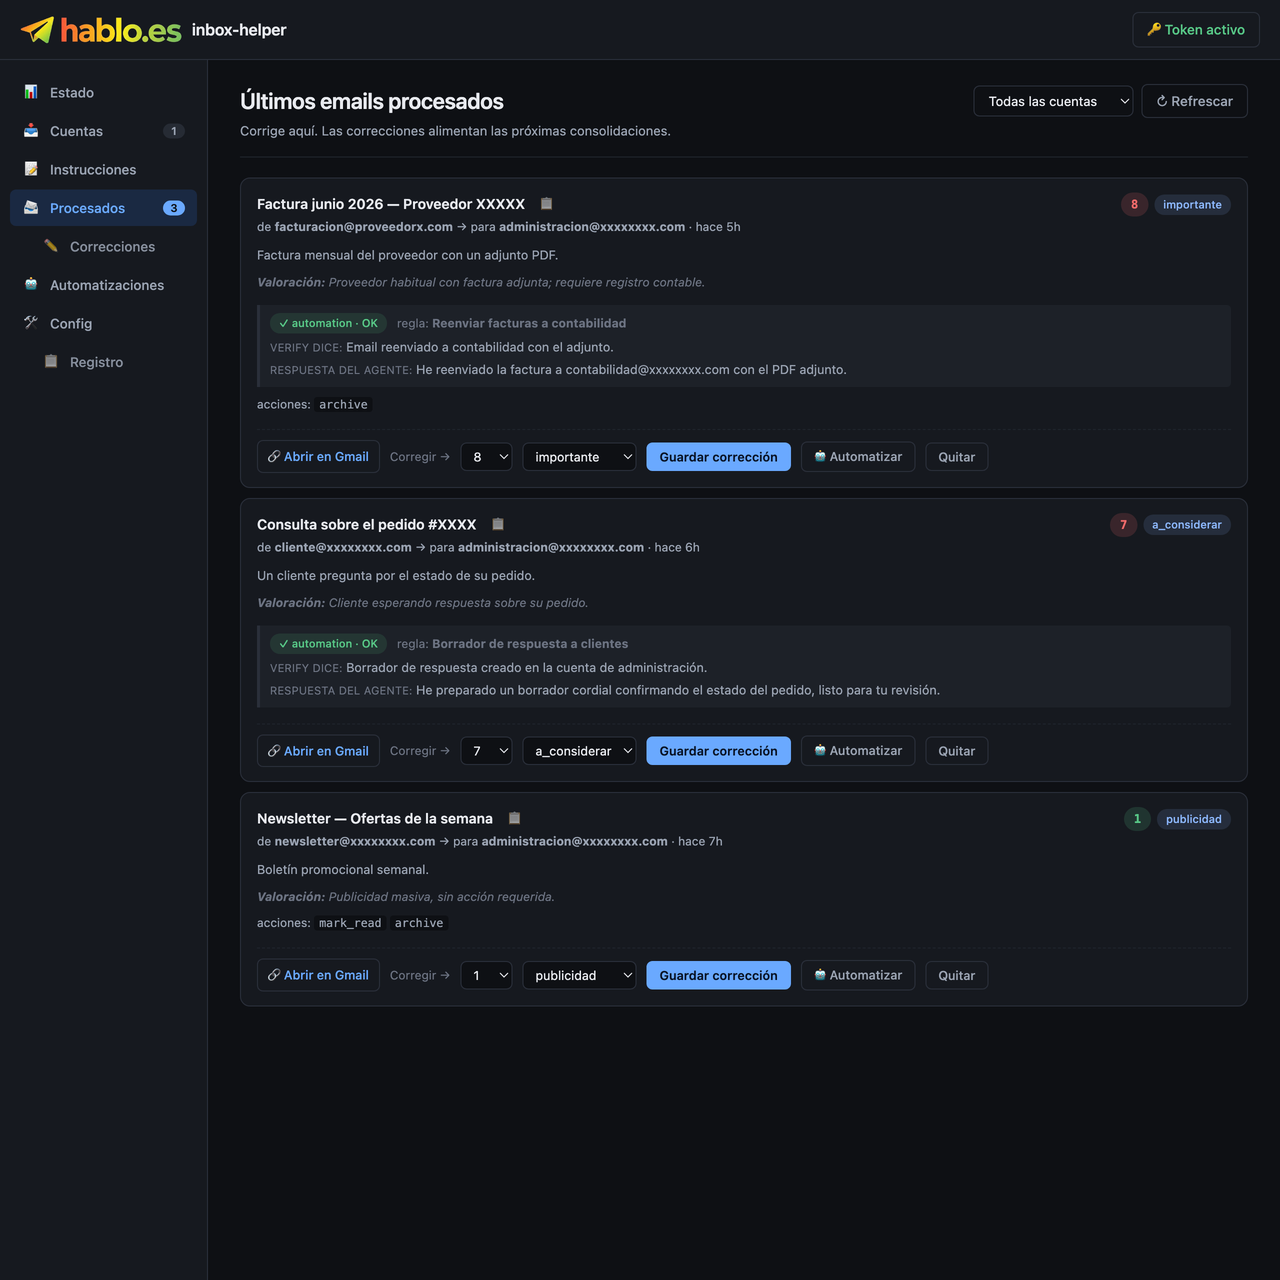
When something important comes in, you'll get a Telegram alert with the subject, the importance, a summary and an 📩 Open in Gmail button. In the Processed tab you can see every email it classified along with its score, whether it pinged you or not.
With that you've already got useful, 100% safe triage: it reads your mail, scores it according to what you told it, and only bothers you with what matters — without touching your inbox.
Level 1.5 · Let it tidy up the noise for you (optional) 🟡
⚠️ Unlike Level 1, this does change your inbox (marks as read / archives). Only do it once you already trust how the plugin scores. Start conservative and review it in Processed for the first few days.
In the same on_score table, add rules so the unimportant stuff stops bothering you:
- Between 0 and 3 →
archive(get it out of the inbox). - Between 0 and 5 →
mark_read(mark it as read).
These are still automatic actions based on the score: the agent isn't stepping in yet. That comes at Level 2.
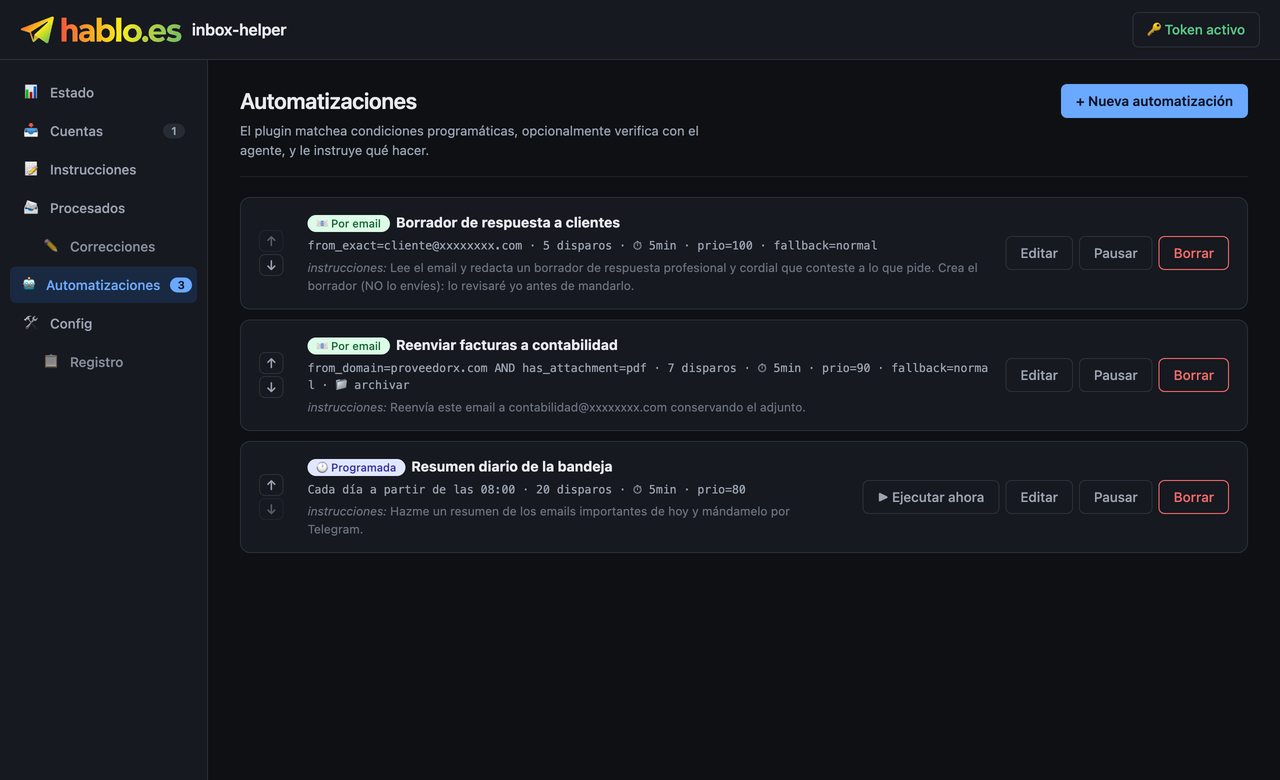
Level 2 · Your first automation: a draft 🟡
Now the agent starts to act, but in the safest way possible: it leaves a ready-made reply draft in your inbox. You review it and send it (or not). The agent never sends anything on its own.
1. Create the rule
Automations tab → + New automation. Description: "Draft reply to clients". Type: "On incoming email".
💡 There's an "Advanced settings" section folded away at the bottom with plenty of options. To start out, don't even open it: the defaults work fine.
2. Condition (to test with peace of mind)
Narrow it down to a specific sender first:
- sender is (exact email):
[email protected]
3. Instructions
What you want the agent to do, in plain language:
"Read the email and write a professional, friendly reply draft that answers what they're asking. Create the draft (do NOT send it): I'll review it myself before sending. If there's information missing to reply properly, flag it in the draft."
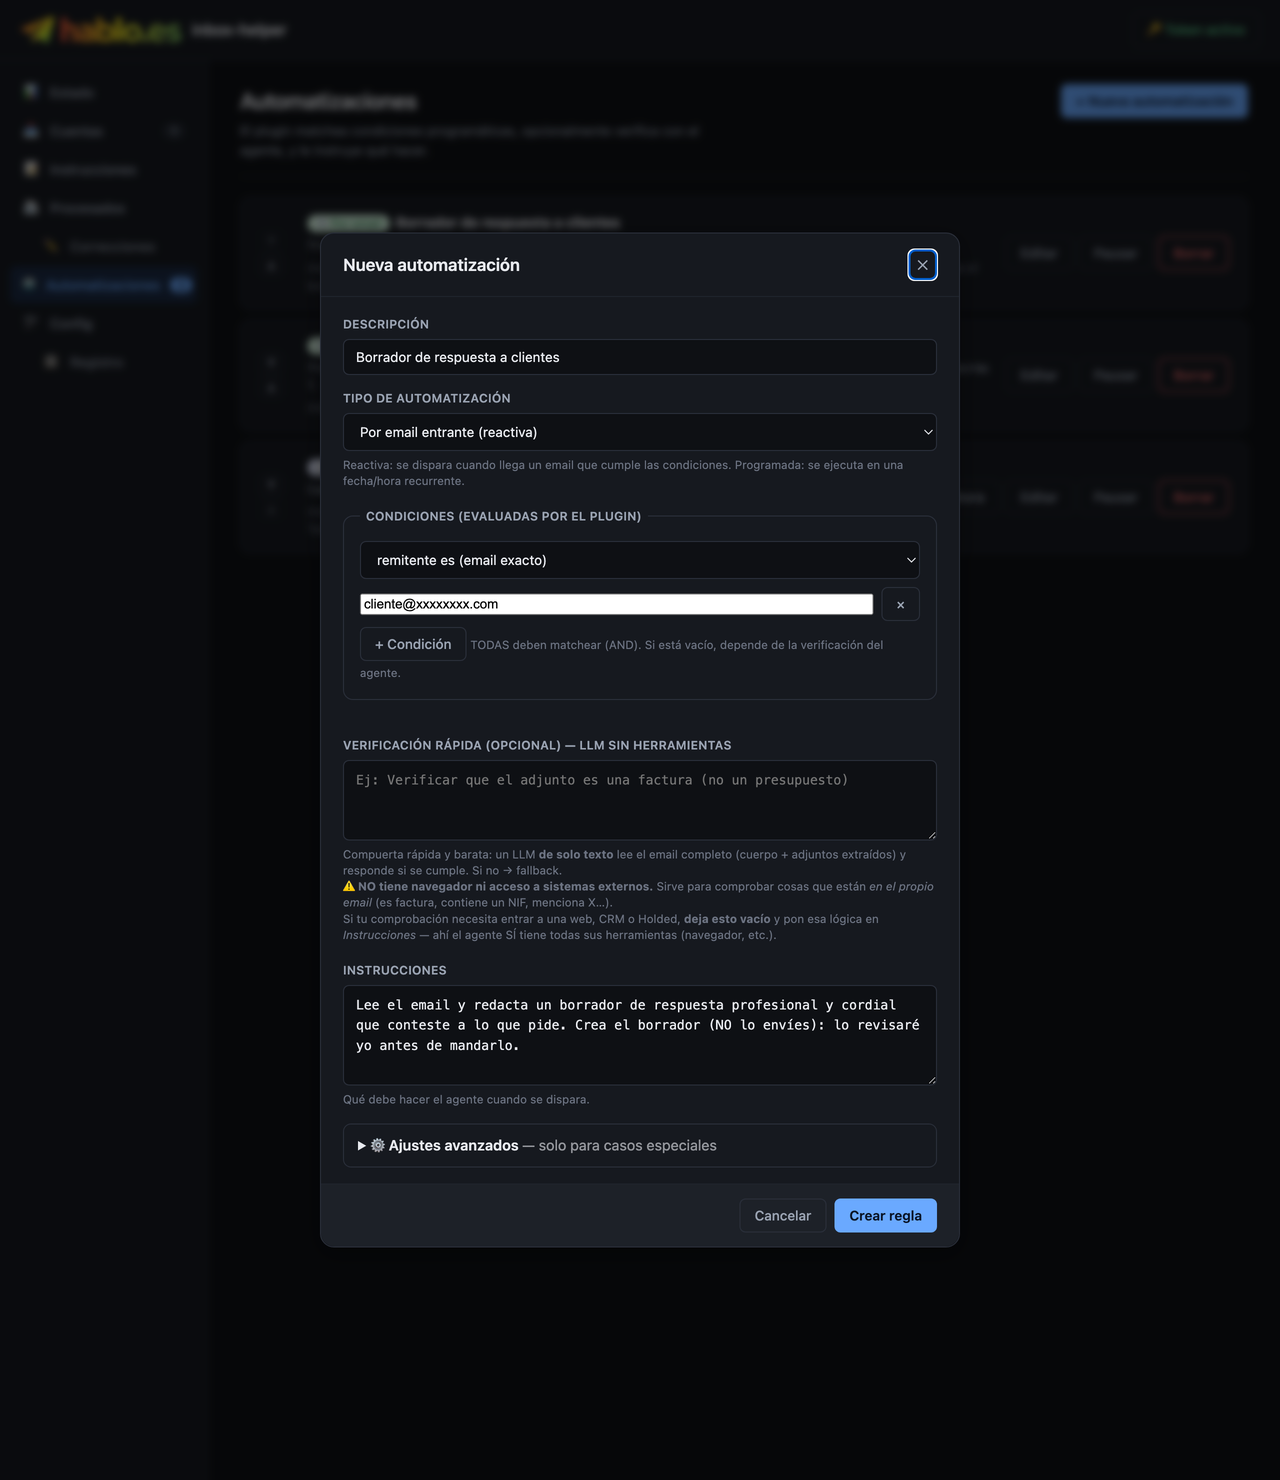
A double safety net: the agent creates the draft in the same account that received the email, and since it's a draft nothing gets sent until you review it and hit send. 🔒
4. Save it and test it right away
When you save, it offers you "Apply to emails already received": pick a past email from that sender and hit apply — you'll watch the agent prepare the draft on the spot. Open it in your mail (the Drafts folder), review it and, if you're happy with it, send it.
Levelling up
Once Levels 1 and 2 are working for you, ask for more just by changing the Instructions or adding Conditions:
- Have it reply directly (instead of leaving a draft): change the instructions to "reply to the sender" — once you trust it.
- Have it forward an email (e.g. invoices): "Forward this email to [email protected] keeping the attachment".
- Have it act only if it's important: add the condition score ≥ 8.
- Have it send a daily summary: create an automation of the "Scheduled by time" type.
Tip: don't go hunting for the "perfect" rule on the first try. Start simple, test it with "Apply to emails already received" and fine-tune as you go.
Trick: let it see only what you decide 🔒
Instead of connecting your whole account, you can add the agent's account (the "🤖 Add agent account" button in Accounts) and, from your mail, set up a forwarding filter to it just for what you care about. That way the agent never sees your full mailbox or your password — only what you forward to it. Then, in your rules, add the condition "account that receives the email = agent".
And that's it: your mail working for you, at your own pace and with a safety net. ✉️✨